Tuesday, June 28, 2011

Leather Satchel Love

I normally don't do this but I found something so amazing that I had to share it with you. I am at an in between stage in my life. I am in graduate school, still living in a college town but I recently started an internship. The first day of my internship it was very apparent that my beloved Vineyard Vines ADPi tote may not be appropriate anymore.


So began my quest for a more professional yet fashionable and young tote bag. After some minor searching I came across The Leather Satchel Company. I automatically fell in love. They make the most beautiful and classic satchels. It took me .5 seconds to decide I had to have one. I waited two long weeks for it to arrive, the company is located in Northwest England. When it finally arrived I was at work and missed the delivery. The second I got home I convinced my little brother to drive to the Fedex distribution center and pick it up (clearly I was really excited!) 


Cody reminded me on multiple occasions that it was really dumb that I was making him take so many pictures. 


The packaging was adorable!
Even a personal note

Finally, I got to see my perfectly professional satchel!

I am absolutely obsessed!! This satchel is more then just fashionable.

1) It is functional...
My computer, planner and random papers all fit inside.

2) It has a five year warranty. If at any point I feel like the stitching is wearing out or the buckles aren't working correctly, all I have to do is send it in and they will fix it for free.

3) Each satchel is created to your personal  specifications. I ordered the 14" satchel in Loch Blue and had them add a handle. Not to mention, the business has been around since the 1960's so you know they are good at what they do.


4) My favorite part...even though I had to grow up a little and get a more mature tote. I can still have a bag with my monogram!!!!


Check out The Leather Satchel Company. Follow them on Twitter @leathersatchel, like them on Facebook and most importantly buy yourself one of their amazing satchels. Every time I carry mine I get compliments.

Tuesday, June 21, 2011

Spray paint + Drop cloth = Curtains

I LOVE Anthropologie with all my heart and want everything they create in my apartment. If only their stuff wasn't through the roof expensive... While trying to redecorate my room I thought, I'll just look and see what they have. Of course I found something I loved that was not within my grad student budget. As always I decided to try and make them myself. 


Supplies:
-Painting drop cloth
-Spray paint
-Stencil

1. Head to the hardware store and pick out your drop cloth. They are in the painting section. Drop cloths come in a million different sizes. Pick the one that fits your set of windows the best. I got lucky, all I had to do to make mine fit was cut the drop cloth in half. 

2. After I cut the drop cloth in half, I ironed it. I did this so that when I spray painted the stencil onto the drop cloth it would be on a flat surface.  As always, I had a little help from a furry friend. This is Ella, my roommates King Charles. 


 3. Next, my mom hemmed the sides and created a pocket for the curtain rod. This drop cloth was already hemmed on each side and on the bottom. All we had to do was fold over the fabric on one side (where I cut the drop cloth in half) of each panel and sew the side. Then we folded over the top and sewed across the top to create a pocket big enough for the curtain rod to go through.


 4. Finally, I put some plastic down and spray painted the stencil on to the curtain panel. I painted the stencil in all different directions and in no apparent pattern. I bought the stencil from etsy at a great shop called lightsforever. It was only $9.50, such a great deal! This is the website if you want to order one http://www.etsy.com/shop/Lightsforever?ref=ss_profile 

5. This is the final project. I love them!!
Tips:
- When spray painting with the stencils, wipe the paint off from time to time. If there is too much paint on the stencil it will drip onto the curtain. Wipe the paint off with a dry paper towel. DO NOT try and wash it off. This is the product of trying to wash wet paint off a stencil.  My cute flower scrubber is now in the trash. 

Cost:
Drop cloth - $14.00
Spray paint- $4.00
Stencil- $10.00


This post has a celebrity dedication. Since this weekend was Fathers Day, I was subjected to watching whatever my dad wanted on the television. Golf, particularly the U.S. Open was his choice. That being said, this post goes out to Rory McIlroy. He played so well at the U.S. Open that it made me want to get my clubs (that have been sitting in my trunk for 6 months) out and head to the driving range with my dad. It could also be because he is really easy on the eyes. Either way he is a great golfer and now a major champion, check him out at http://www.rorymcilroy.com/home.html he also has a twitter if you want to follow him @mcilroyrory

Ohhh and here is a picture of me and my dad in honor of Father's Day. He is the best!!


Tuesday, June 14, 2011

Low-Calorie Cocktail

With summer at its hottest, just thinking about drinking beer or wine makes me feel heavy and lethargic. Last night my roommate brought home a recipe for a low-calorie cocktail. It turned out to be just what I wanted, a delicious and light drink. Perfect for these hot summer days. The wonderful ladies on the View along with the guys at Ocean Spray provided her with the recipe.


 Ingredients:
1. Vodka
2. Ocean Spray Sparkling Juice Drink
3. Lime juice
4. Mint leaves

1. To begin, crush the mint leaves into small pieces. We are spoiled with the herb garden my roommate's mom made. It  allowed us to use fresh mint but most grocery stores also carry mint leaves.

2. Add one shot of vodka to each glass.


 3. Add a sprinkling of mint to each glass.


 4. Pour a tablespoon of lime juice into each glass.


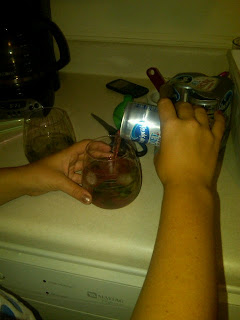
 5. Top it off with Ocean Spray Sparkling Juice Drink. We used one whole can in each cocktail. These are great to drink without the vodka too!


6. Add some straws and you are set!


This post is dedicated to my friend Leslie, a returning competitor in the Miss. Georgia pageant. When she brings home the 2011 Miss. Georgia crown, we will be celebrating with this yummy drink. The picture below is Leslie packed up and ready for success at Miss. Georgia.


Tuesday, June 7, 2011

Bar Stool Make Over

A couple of months ago my boyfriend was complaining that he didn't have any bar stools for his apartment. Conveniently, I had some to give to him. He was less than thrilled when he saw what they looked like.
The picture on the left is one of the stools before its transformation. They are fairly girly. The one on the right is me and Middleton. I looked for a serious picture of the two of us and couldn't find one, so I went with my favorite picture.

The bar stools used to have roosters on the top. When we redecorated our apartment I modge podged this paper on the top of the stools. It was really easy. I just bought the paper traced the circle of the bar stool on the paper, cut it out and modge podged it to the top. 

I spent a few weeks trying to come up with a way to make the stools more masculine. This is what I came up with:
Supplies:
Bar stools
Liquid nail
Nylon rope
Lighter
Tape
Scissors
Gloves
Caulk gun
Popsicle stick
Spray sealant

1. Take the end of the nylon rope and wrap it into a small coil.

2. Squirt some of the liquid nail into the center of the bar stool and spread it out. I used a popsicle stick to spread out the liquid nail.
3. Place the coil onto the liquid nail. 


4. Continue to spread more liquid nail and wrap the coil. Make sure you are using a very thin layer of liquid nail, otherwise it will show through the rope. If it does show through the rope take a tooth pick and pick it out. If you use a cloth to try and wipe it out, it just spreads the liquid nail and discolors the rope.

5. Once you have wrapped the entire top of the stool you can press the rope with your finger tips and spread it to the edges.

6. To end the rope coil, first tape the end of the rope. If you don't, the coil will unravel really quickly when you cut it. Cut the rope slightly past the end of the tape. Once you have cut the rope, take your lighter and burn the ends. Once it sticks together tuck the end of the rope under the last layer of the coil. If it sticks up a little too much you can take a hammer and gently pound it in order to flatten it out a bit. You may want to add some more liquid nail where you are tucking the rope to make sure it stays put.


7. Finally, spray the tops of the stools with a sealant in order to protect them from water and food spills.


 This is a picture of the bag the rope came in. I used nylon rope because I thought it would be easier to clean, and not so itchy on your bum if you have on shorts.
I chose to use the extra strength liquid nail. When I was at the hardware store the man helping me said he would use the extra strength just because there would be a good bit of movement and weight on the stools.

Cost:
Bar stools- I already had them so they didn't cost me anything. You could probably find some at a garage sale.
Nylon rope- $15 I bought a 100ft rope and it was the perfect amount to cover two stools
Liquid nail- Extra strength  is around $6 . I think regular strength costs about $3.
My dad had a caulk gun so I didn't have to buy that either. Over all I spent a little over $20, not too bad!!

Tips:
1. Wear gloves. It's three days later and I am still trying to get the liquid nail off my hands.
2.When you cut off the tip of the liquid nail make it a fairly wide opening. The liquid nail is very thick and it took all of my strength to get the stuff to squeeze out of the tube.
3. Be sure when you lay the liquid nail down while you are coiling the rope, you lay it on newspaper. It will still come out of the tube even after you stop squeezing and you don't want it to end up on your table.
4. When you are finished, if you have some liquid nail left and want to save it, simply place a screw in the end of the opening. When you use it again simply take a screw driver and unscrew it.


This post is dedicated to my dear friend, Zack. A few years back he gave my roommate and me the bar stools. They have worked in three different apartments now. Zack just graduated and will be starting graduate school in the Fall.