Tuesday, August 30, 2011

Wrought Iron Headboard


I took a little bit of a break from my blog. The main reason being I have been out of the country. My roommate and I spent 3 weeks traveling through Europe. We had a great time and I will post some pictures soon. Now that the school year has begun again I am back to blogging. I have some really great and cost effective projects to come (after my trip I have been penny pinching even more then ever!) This project is one of my FAVORITE so far...


When I decided to move last year, I also I decided I wanted to redecorate my bedroom. I started the redecoration process by searching for a bed. My first stop was Anthropologie. As always, I fell in love with something way outside my price range. I emailed a picture of the bed to my mom. Thankfully,  she was game for trying to recreate the beautiful headboard. This is my favorite project!

Supplies:
Decorative wrought iron piece
2 2X4's
3 add a leg kits
Spray paint
Epoxy


1. Find your wrought iron pieces. My mom and I started our search at estate sales but weren't finding anything. We decided to change to antique/junk type stores. That is where we found the pieces I used. One piece wasn't large enough. I called a welder, he stopped by my house and welded the two pieces together in about 5 minutes. It wasn't very expensive either. 

                                       
Notice all the stuff in the background? My parents and I just had what we so kindly call the "Great Debate" again. It is over why I hoard random objects in our garage and say they are for crafts. Have any of you ever had that conversation? 

2. Cut your two 2X4's to the length you want your iron pieces (remember most hardware stores will cut the wood for you) and nail them together.


3. Hold the iron piece on top of your wood. Mark where the legs touch the wood. Drill a hole where you marked, large enough for the legs to fit.

Dad was kind enough to drill the holes for me.

My little brother Cody was a great help!

4. Fill the holes with epoxy and insert the iron piece into the wood. 


We squirted out the epoxy and then used a popsicle stick to get the epoxy into the holes. You may want to wear gloves, epoxy will not come off easily!

 6. Once the epoxy is dry, spray paint the base of the head board. Also, spray paint the legs to match.


7. Next, attach your legs. This part was really simple I just bought the little kit (pictured below) and screwed them to the base. I measured the height of the bed frame and had the hardware store cut the legs to fit. 


8. Then stand the head board up right and screw the bed frame into the base of the headboard.


9. Finally reassemble your bed.


This is the final product. I am in LOVE!!


Monday, July 11, 2011

Guest Post

Today I am guest posting at Someday Crafts
I am sharing my wrought iron headboard.


Check it out at...


Monday, July 4, 2011

Burlap Ruffled Curtains

I have a slight obsession with burlap. You will probably realize it after I post my next few projects. They all contain burlap somewhere. Our living room was in dire need of some curtains. The sun shines straight  in and the windows face the street. This is what I came up with. The picture below doesn't do the curtains justice (especially since the pillows aren't even straight on the sofa). I will be posting another picture soon. I just don't have one at the moment!


Supplies:
Plain curtains
Burlap
Sewing machine & supplies


I cheated and bought already made curtains at Goodwill and just added to them. Creating the fun girlie curtains I have now. They only cost $5. I couldn't have bought fabric for that cheap. 


This is what the plain curtains look like. When I first came up with the idea I was just going to put ruffles on the bottom.  This curtain had a not so attractive burgandy band at the top so I decided to put a ruffle at the top also to cover the band.


1. Take the burlap and cut it into six strips. Four larger ones for the bottom ruffles and two smaller ones for the top ruffle. Cut the strips twice as long as the horizontal length of the curtain. To make good ruffles you need the fabric to be double the length.


2. Take each one of the strips and hem them on both sides.

3. To create the small ruffle take each of the hemmed small strips and sew a line right through the middle of the strip.

4. Next, to get the fabric to ruffle, pull the top string from the stitch down the middle srunching the fabric   forming a ruffle. You can work from both sides of the strip. Pull from both sides until you have created a ruffle that is the same length as the curtain. 

5. Then, take the ruffle and place it on top of the curtain. I placed mine so that the middle of the ruffle was right on top of the burgandy strip. Pin the ruffle in place and sew down the middle to attach the ruffle to the curtain. 


6. To make the bottom ruffles I took the hemmed bottom strips and stitch another line right under the hemmed line. I pulled one of the strings from the stitch on both sides to form the ruffle. 
My cat Michigan always has to be in the middle of things. I named her after the University not the state.

7. Finally, I pinned both of the bottom ruffles onto the curtain one at a time and sewed them to the curtain very close to the top (not in the middle like the top ruffle). 

8. Repeat for the second curtain.


This post is a little confusing but it is actually really easy. If you have any questions about how to complete the project, feel free to email me at ashtonscraftycreations@gmail.com

This post is dedicated to a dear friend Brittni. She was so kind and designed the layout, header and the button for my blog. My blog would look VERY rough if it wasn't for her! 
This is us after our graduation. Brittni is blonde in the pink. 


She also has a blog. Check her out at PR Adventures of a Southern Belle!


Tuesday, June 28, 2011

Leather Satchel Love

I normally don't do this but I found something so amazing that I had to share it with you. I am at an in between stage in my life. I am in graduate school, still living in a college town but I recently started an internship. The first day of my internship it was very apparent that my beloved Vineyard Vines ADPi tote may not be appropriate anymore.


So began my quest for a more professional yet fashionable and young tote bag. After some minor searching I came across The Leather Satchel Company. I automatically fell in love. They make the most beautiful and classic satchels. It took me .5 seconds to decide I had to have one. I waited two long weeks for it to arrive, the company is located in Northwest England. When it finally arrived I was at work and missed the delivery. The second I got home I convinced my little brother to drive to the Fedex distribution center and pick it up (clearly I was really excited!) 


Cody reminded me on multiple occasions that it was really dumb that I was making him take so many pictures. 


The packaging was adorable!
Even a personal note

Finally, I got to see my perfectly professional satchel!

I am absolutely obsessed!! This satchel is more then just fashionable.

1) It is functional...
My computer, planner and random papers all fit inside.

2) It has a five year warranty. If at any point I feel like the stitching is wearing out or the buckles aren't working correctly, all I have to do is send it in and they will fix it for free.

3) Each satchel is created to your personal  specifications. I ordered the 14" satchel in Loch Blue and had them add a handle. Not to mention, the business has been around since the 1960's so you know they are good at what they do.


4) My favorite part...even though I had to grow up a little and get a more mature tote. I can still have a bag with my monogram!!!!


Check out The Leather Satchel Company. Follow them on Twitter @leathersatchel, like them on Facebook and most importantly buy yourself one of their amazing satchels. Every time I carry mine I get compliments.

Tuesday, June 21, 2011

Spray paint + Drop cloth = Curtains

I LOVE Anthropologie with all my heart and want everything they create in my apartment. If only their stuff wasn't through the roof expensive... While trying to redecorate my room I thought, I'll just look and see what they have. Of course I found something I loved that was not within my grad student budget. As always I decided to try and make them myself. 


Supplies:
-Painting drop cloth
-Spray paint
-Stencil

1. Head to the hardware store and pick out your drop cloth. They are in the painting section. Drop cloths come in a million different sizes. Pick the one that fits your set of windows the best. I got lucky, all I had to do to make mine fit was cut the drop cloth in half. 

2. After I cut the drop cloth in half, I ironed it. I did this so that when I spray painted the stencil onto the drop cloth it would be on a flat surface.  As always, I had a little help from a furry friend. This is Ella, my roommates King Charles. 


 3. Next, my mom hemmed the sides and created a pocket for the curtain rod. This drop cloth was already hemmed on each side and on the bottom. All we had to do was fold over the fabric on one side (where I cut the drop cloth in half) of each panel and sew the side. Then we folded over the top and sewed across the top to create a pocket big enough for the curtain rod to go through.


 4. Finally, I put some plastic down and spray painted the stencil on to the curtain panel. I painted the stencil in all different directions and in no apparent pattern. I bought the stencil from etsy at a great shop called lightsforever. It was only $9.50, such a great deal! This is the website if you want to order one http://www.etsy.com/shop/Lightsforever?ref=ss_profile 

5. This is the final project. I love them!!
Tips:
- When spray painting with the stencils, wipe the paint off from time to time. If there is too much paint on the stencil it will drip onto the curtain. Wipe the paint off with a dry paper towel. DO NOT try and wash it off. This is the product of trying to wash wet paint off a stencil.  My cute flower scrubber is now in the trash. 

Cost:
Drop cloth - $14.00
Spray paint- $4.00
Stencil- $10.00


This post has a celebrity dedication. Since this weekend was Fathers Day, I was subjected to watching whatever my dad wanted on the television. Golf, particularly the U.S. Open was his choice. That being said, this post goes out to Rory McIlroy. He played so well at the U.S. Open that it made me want to get my clubs (that have been sitting in my trunk for 6 months) out and head to the driving range with my dad. It could also be because he is really easy on the eyes. Either way he is a great golfer and now a major champion, check him out at http://www.rorymcilroy.com/home.html he also has a twitter if you want to follow him @mcilroyrory

Ohhh and here is a picture of me and my dad in honor of Father's Day. He is the best!!


Tuesday, June 14, 2011

Low-Calorie Cocktail

With summer at its hottest, just thinking about drinking beer or wine makes me feel heavy and lethargic. Last night my roommate brought home a recipe for a low-calorie cocktail. It turned out to be just what I wanted, a delicious and light drink. Perfect for these hot summer days. The wonderful ladies on the View along with the guys at Ocean Spray provided her with the recipe.


 Ingredients:
1. Vodka
2. Ocean Spray Sparkling Juice Drink
3. Lime juice
4. Mint leaves

1. To begin, crush the mint leaves into small pieces. We are spoiled with the herb garden my roommate's mom made. It  allowed us to use fresh mint but most grocery stores also carry mint leaves.

2. Add one shot of vodka to each glass.


 3. Add a sprinkling of mint to each glass.


 4. Pour a tablespoon of lime juice into each glass.


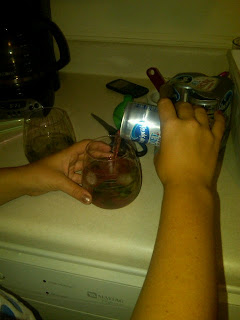
 5. Top it off with Ocean Spray Sparkling Juice Drink. We used one whole can in each cocktail. These are great to drink without the vodka too!


6. Add some straws and you are set!


This post is dedicated to my friend Leslie, a returning competitor in the Miss. Georgia pageant. When she brings home the 2011 Miss. Georgia crown, we will be celebrating with this yummy drink. The picture below is Leslie packed up and ready for success at Miss. Georgia.